Showing posts with label bead weaving. Show all posts

Monday, September 19, 2011

Taken in Trade

Trading with other artists can be fun and profitable. As I promised in the previous post, here's the trade I made with Ruth Wood of mack-glass.com.  The largest cab is about 1.5 inches long.

My bracelet
Ruth's cabochons
Ruth loved the bracelet when I delivered it. I took along a bunch of my work, and she and her friend and sister-in-law all modeled a bunch of it. They were good for my ego, admiring and all. I may join Ruth at her farmer's market booth to try to sell some of my stuff. It would be good to have someone along for the ride my first time doing retail. 

Pretty cool trade, huh? I've got a lot of of projects in mind for these bits and bobs. I'll keep you posted.  It's also nudging me toward getting a small microwave kiln, as that is what Ruth uses for the small cabs. No 24-hour heating cycles, no worrying about a big kiln. One hour, in and out. I already have a ton of glass, including about 3 pounds of dichroic scraps I picked up several years ago.  

There's always something new to learn, new to try, new to do. 

Friday, September 16, 2011

Beading Returns to Life, and How to Get Great Art Stuff for Almost Nothing

Things have slowed down a bit with the software, so I have been able to feel a bit of creativity creeping back into my life.

I've also found a way to acquire more artistic fuel (beads & materials) without spending money...trade!  I think this is a terrific way for fellow artists to support one another and to spread the creativity around.
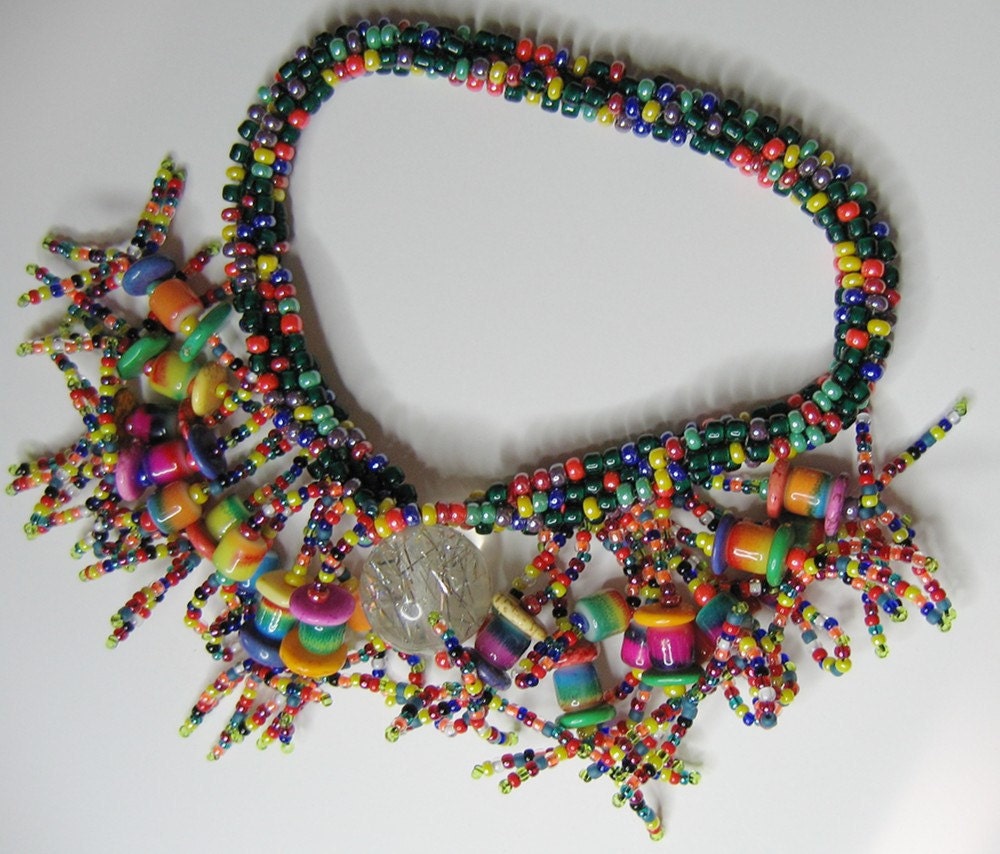
Original bracelet
Several weeks ago, at a local farmer's market, Ruth Wood saw me wearing my new tutti-frooti bracelet. (Tootie-frutti? There are a dozen ways to spell this, all of which my spell-checker rejects.)  Ruth does wonderful fused glass cabochon work, and after I let her try on the bracelet I happened to be wearing, we worked out a deal to trade a similar bracelet made to fit her for some of her cabs.
Ruth's bracelet

This is her bracelet, to be delivered this Sunday at the market.  I'll post some pictures of the cabs next week.  I also made some earrings to go with, so we'll see what happens with them!

We each worked out what we would sell our pieces for, retail. We agreed that trading retail values was fair, as this included the labor (and profit) as well as materials. Tiny bits of glass for fused cabs cost nearly nothing, its the work and expertise that make them valuable. The same, or nearly the same goes for the beads. Material costs are small, but those hours creating fringe add up!

Earrings to go with
Of course, the IRS wants you to declare the value of traded goods and pay taxes on them, unless you have a resale license. Both Ruth & I do, so consult with your tax expert on your own situation. Don't Mess the IRS is our policy around here. Those people are scarier than Homeland Security!

In other beady news, I built a peyote bracelet with some 4mm cube beads in a very elusive color. I don't know exactly what to call it. The description on the tube was "jade" but it's got a lot of bronze, yellow, and opalescent notes in it. These pictures actually represent it pretty well. What would you call it?
"Jade?"

The edge beads are hematite rounds, 4mm, which fit exactly with the cubes.  They give the whole bracelet a solid heft that the light cubes do not. I like it, actually. I think when I list it on Etsy, I'll do some research and tout the spiritual values of hematite. 

What color is it, really?
The newest issue of Bead & Button magazine came out with a project done in spiral herringbone (as well as an ad for, ahem, BeadEnCounter software). It's basically a herringbone rope done with varying sizes of beads, from 15/0 to 8/0 and drop beads at the outer edge. Like peyote spirals, these varying sizes of beads make the rope bend as you work. 

Spiral herringbone
Well, the project is supposed to make a long spiral that is then interconnected with some strung segments. Very cute, but once I got the spiral going, I realized that it would be very easy to turn into a circle. And I didn't have the patience at that moment to continue on. So here are the earrings I created with my test pieces. Very very easy to do, and quick to work up. I think the second one only took me half an hour or so. 

At some point I may return to the technique and do the actual spiral. Herringbone isn't my favorite but I'm getting to know it better.  

Right now, though, I'm scheming to find other artists to trade with. Who will love my work enough to trade with me?


Sunday, August 29, 2010

Tubular Peyote: Deceptively Simple. Or Is It? With Pictures

At the aforementioned Pasadena Bead Show on August 1, I saw some work done by the President and Vice President of the LA Bead Group. Sorry, don't know their official name. They had made some tubular peyote neck rings and the work was so tight and fine that the rings were nearly rigid. Either that or they had wire inside. The bead weaving was still very tight, though.  Beautiful. Admirable. Something to aspire to.

I wanted to try something similar. So I tried, four times, to start a tubular peyote tube with a lovely golden 15/0 seed bead. Each time I missed my mark on where to step up, and so the entire tube fell into devastation. Clipped it apart, tried again.

On try number 5, I got sick of it and worked each successive round in a different color, one round gold, one round a lovely fuschia purple. This gave the effect of stripes. Not what I wanted, but at least the tube was working. Once I had the tube established, I switched back to all gold. 


For some reason, when starting ANY peyote project, I struggle with the first three rows or rounds, sometimes a few more. This may be common, I'm not sure. I haven't taken and classes to watch anyone else do it, and any online video tutorials make it all look soooo easy. But I really hate that my first rounds are loose and somehow I can never get them as tight as the later work.

The first picture is of the initial tube, with stripes, and then, where I transitioned over to all-gold.  The tube is in two parts because I ended the thread badly without a proper knot, and it just fell into two parts! But I kept going on part 2, first weaving in a purple diamond, then starting a purple spiral to mark where to step up each round.  The picture is hard to see because the gold is so sparkly. 

The second picture is of my first Cellini spiral, from an article in the new Bead & Button, the Cellini Sampler, by Anna Elizabeth Draeger.  While it is a very straightforward tubular peyote stitch, the variation in the size of the beads makes it spiral. With other types of spirals, you have to increase & decrease to get the spiral, but with this one, it's super easy. I figured out the secret is that whatever bead you just sewed through, that's what you pick up. If you just sewed through a color B, pick up a B. If it's a D, pick up a D. And so on. So you always know exactly where you are. 

You would think that the straight tubular peyote would be as simple. For me, it's not. From one end of a round to the other, even if each round is only 5 or 6 beads, I can't count as my mind wanders to other thoughts. And there I am, wondering where the heck I am.

Oh, to be such an expert that starting and continuing on tubular peyote is easy!